Godot TileMapLayer
Basic tilemap usage
Section titled “Basic tilemap usage”- Pro-tip: use “Distraction Free Mode” when working with tilemaps so that you can see more! It’s the “expand” icon at the upper right of the editor.
- To set one-way (i.e. directional) collision on a tile map, see these instructions.
- Note: you can only set a collision layer at the level of a whole
TileMapLayer, not for individual tiles.
Autotiles and terrains
Section titled “Autotiles and terrains”- See this page for detailed help
- Make a
TileMapLayer - Make a
TileSetfor it- In the
TileSetInspector, add a Terrain Set - Then, click “Paint” in the tile-set editor and paint in the new terrain set
- After doing this, that exact same mode can be used to paint the bitmask onto those tiles
- In the
- Make a
- If you need to “expand” your input graphic so that all of the connections are covered (e.g. you only have ~16 tiles and need ~48), you can use Webtyler (direct link to tool).
- For
SetCellsTerrainConnectorSetCellsTerrainPath- Parameters
- Terrain set
-
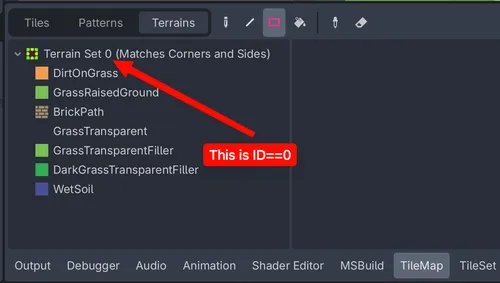
- Terrain: get via Godot → TileMapLayer → TileSet (in the Inspector) → Terrain Sets. The order of them there dictates the ID.
- If you want to use the name from code, I think you would have to read each terrain and then call
GetTerrainNameand compare against the name that you’re looking for
- If you want to use the name from code, I think you would have to read each terrain and then call
- Terrain set
- Difference between the two
- It’s the same as the difference between the terrain and path brushes:

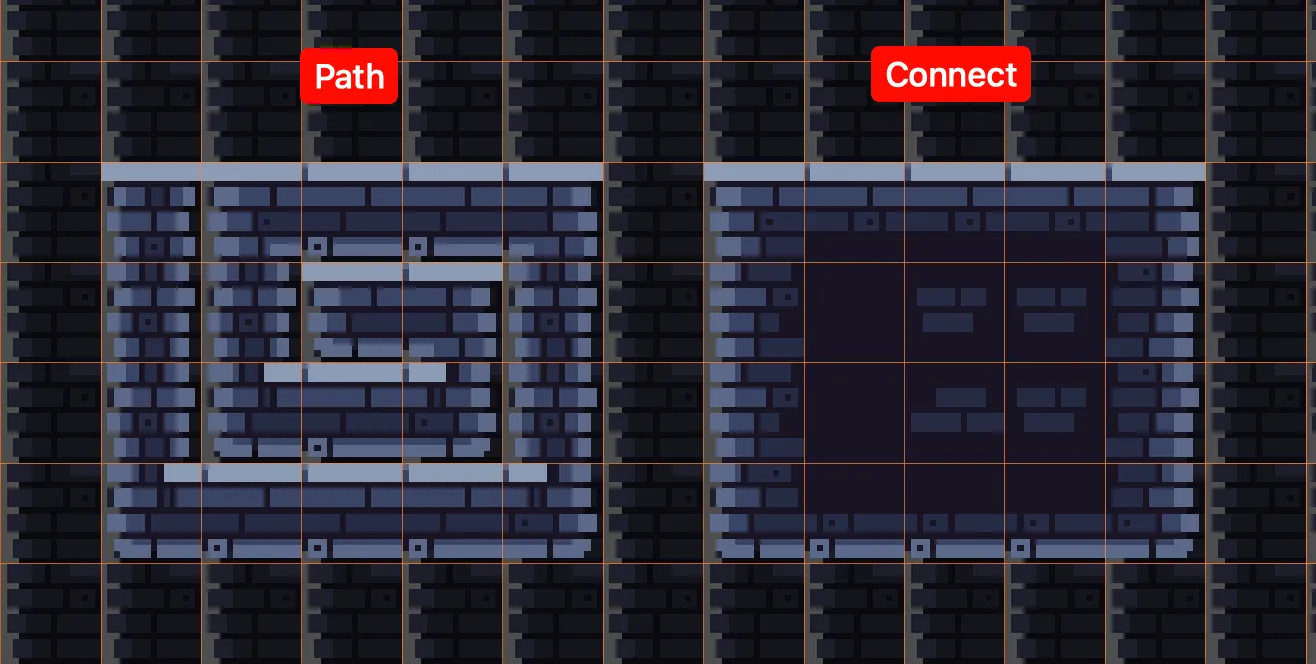
- To make it clearer what the difference is between the path and connect tools, take a look at what’s below. In both, I drew from the center spiraling outward (clockwise). The path tool only connects to the single prior tile, whereas the connect tool makes them look like a continuous object.
- It’s the same as the difference between the terrain and path brushes:
- Parameters
Bitmask explanation
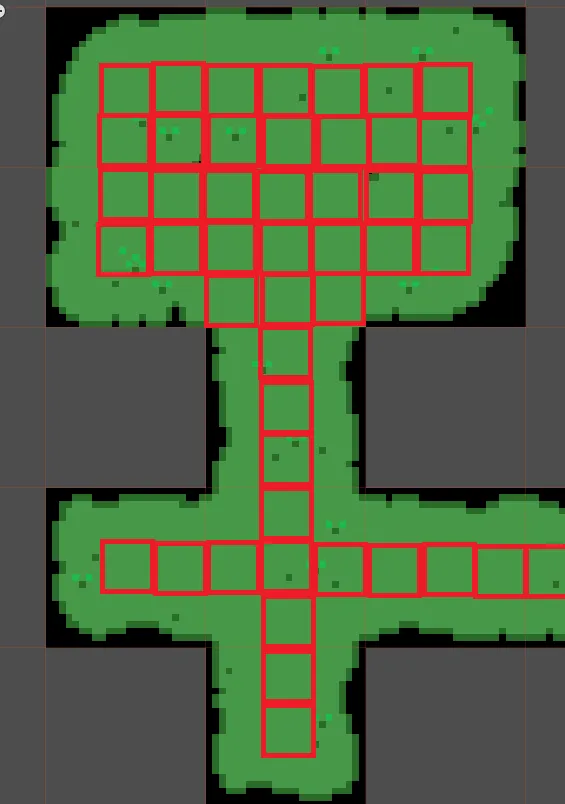
Section titled “Bitmask explanation”Remember, they’re not magic! Godot is just connecting shapes that it can match from the bitmasks that you set up. I hastily annotated a small map with red squares to represent the bitmasks:
Suppose we never set up a bitmask for this ”+” shape that you see in the bottom middle:
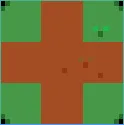
The map would go from this:
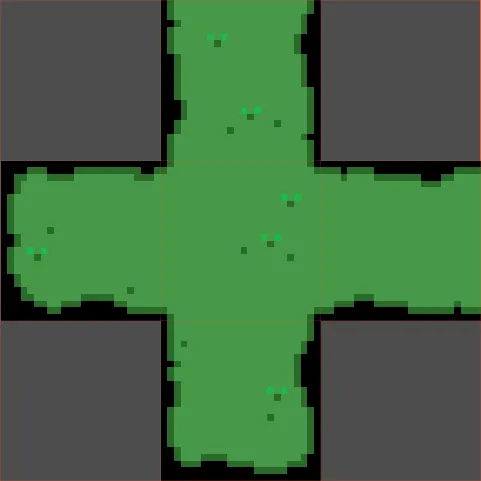
…to this:
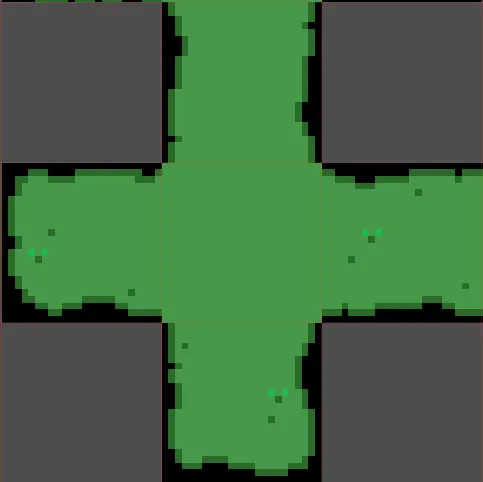
(it’s subtle, but you can see the black pixels at the corners of the middle tile have disappeared since Godot no longer found a ”+” connector)
TileSetScenesCollectionSource
Section titled “TileSetScenesCollectionSource”This is a way of painting scenes directly onto the tilemap (reference). The scenes occupy tile slots. They’re slightly less configurable than standalone scenes. E.g. you can’t see them in the Inspector, so you can’t change arbitrary properties. For that reason, if you find yourself needing to change, say, a floating-point number (e.g. you want to manifest a percent chance for something to happen on a tile), you should probably just use an instantiated scene or a custom data layer. However, if you only have a small number of variants, you could just make explicit scenes for all of them which inherit from the same base scene.
To set them up:
- Select a
TileMapLayer - Click “TileSet” to edit its
TileSet - Click the ➕ and add a “Scenes Collection”
- Drag a scene onto the new collection
- Switch back to “TileMap” view
- Click the scene that you added
- Paint it onto the map
Custom data layers
Section titled “Custom data layers”You can add custom metadata to tilesets (reference). For example, if you have grass, dirt, and stone in your game, you may want to manifest which sounds each tile will play so that you don’t have to do exhaustive checking based on source IDs and tile positions.
It’s very easy to set up by following the documentation.
Troubleshooting
Section titled “Troubleshooting”Fading in layered TileMapLayers looks weird
Section titled “Fading in layered TileMapLayers looks weird”In this screenshot, you can see the green boundary around the stone, but it’s supposed to be the same color as the surrounding tiles. 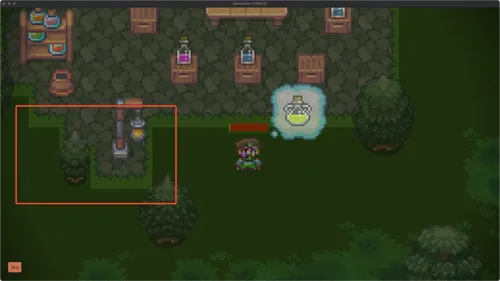
Here’s what it should look like: 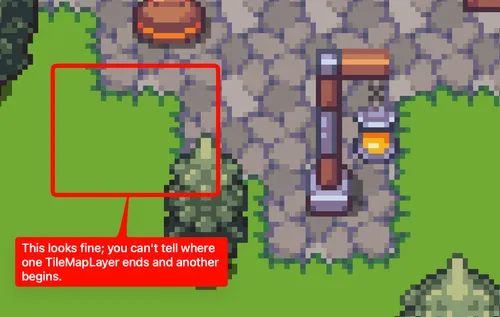
The scene hierarchy is:
Node2D RootTileMapLayer GreenFillTileMapLayer StoneGroundTileMapLayer TreesAndLamps
This technically isn’t even a Godot problem; this is just what happens when you have two overlapping layers fading in from 0 opacity. You essentially need to treat them as one layer, for which you have two options:
- Put the layers into a
SubViewport, then make aSprite2Dwhich uses theSubViewportas aViewportTexture.- Note: anything in the
SubViewportneeds to have positive coordinates to appear in the sprite’s texture, so you can move the layers positively and theSprite2Dnegatively to offset this change.
- Note: anything in the
- Put the layers into a
CanvasGroup, which draws everything as a single object.- Note: if you do this, you need to modify the
CanvasGroup’sself_modulate, not themodulate. - Note: it seems like descendants with a different Z-index will not be affected by the
CanvasGroup’sself_modulate.
- Note: if you do this, you need to modify the