ELB
Created: 2016-03-04 16:16:29 -0800 Modified: 2019-07-22 15:14:51 -0700
Basics
Section titled “Basics”- Slow Start Mode (reference): from what I understand, you can make it so that endpoints are intentionally unhealthy upon registration, that way traffic isn’t routed to them until the endpoint explicitly says that it’s healthy. I think this is useful if your endpoint has to do something at startup like reaching out to a database, caching something, etc.
- When using the CLI, use elbv2 unless you’re working on a classic load balancer.
Network load balancer vs. application load balancer (reference)
Section titled “Network load balancer vs. application load balancer (reference)”The network load balancer is concerned entirely with the destination IP address and port. I.e. it can’t look at cookies, application state, etc. to make any load-balancing decisions.
Load-balancing strategies
Section titled “Load-balancing strategies”(e.g. round robin, CPU-based, IP-based)
If you’re using a classic load balancer (and you’ll see this in the EC2 console under “Type”), then you can’t change this strategy.
Rate-limiting (reference)
Section titled “Rate-limiting (reference)”According to the reference above, ELB doesn’t provide a way to rate-limit requests. You would either have to add something into the mix like Redis or HAProxy or just handle it in your application servers.
IP address and X-Forwarded-For
Section titled “IP address and X-Forwarded-For”If you’re going to do rate-limiting, make sure you’re not doing it based on just IP address since the application will see the IP of the load balancer, not the client. The way that you get around this is by using the X-Forwarded-For header. This will be added for you by CloudFront:
11:21 HiDeoo: Adam13531 Cloudfront does that “If a viewer sends a request to CloudFront and does not include an X-Forwarded-For request header, CloudFront gets the IP address of the viewer from the TCP connection, adds an X-Forwarded-For header that includes the IP address, and forwards the request to the origin.” (reference)
I ended up doing a video on this: https://www.youtube.com/watch?v=qxB1uJhT-fs
Application-level rate-limiting
Section titled “Application-level rate-limiting”If you’re planning on implementing rate-limiting in your application, realize that it won’t be effective unless you have sticky sessions enabled in your load balancer, otherwise it’s possible that a user gets load-balanced to a different application server that doesn’t have your rate-limiting information.
Alternatively, you could implement a datastore (likely an in-memory cache like Redis or memcache) that each application server reaches out to before processing the request.
Sticky sessions (reference)
Section titled “Sticky sessions (reference)”Just click the “Edit stickiness” button in the AWS Management Console for load balancers

A rule of thumb that I got online was to get the average session duration and set the cookie stickiness to about 1.5x that amount. My average session length right now is 11m, so I’ll set my stickiness to 15m.
Investigating DOS (denial of service) attacks
Section titled “Investigating DOS (denial of service) attacks”First, logging has to be enabled via Console → EC2 → Load balancer → Description tab → Attributes → Enable access logs.
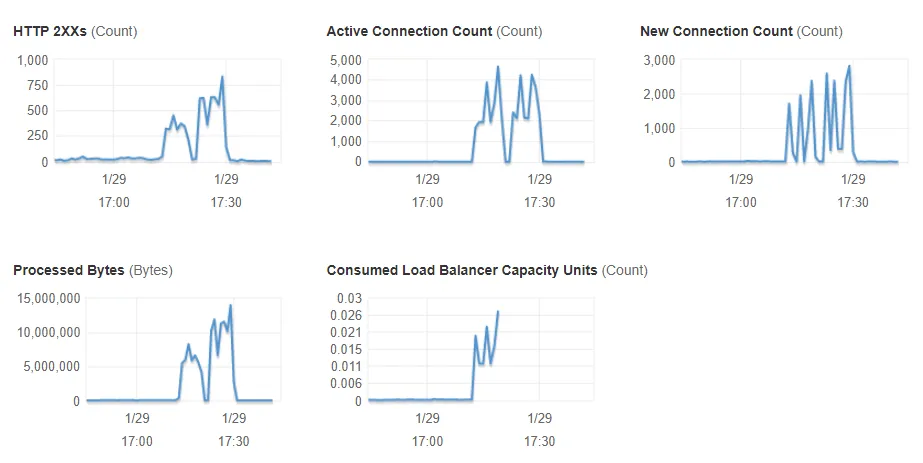
- In the AWS Console for your load balancer, you can see the number of requests in the last ~hour in the Monitoring tab. Something like this is an indicator of an attack:
- Connect via CrossFTP (which didn’t work for me on Windows for some reason) or WinSCP to your S3 logs (in WinSCP, use S3 AWS and provide your access/secret keys from the credentials file).
- Logs are stored as zip files. Logs with <20 KB of information are probably normal traffic. I got ~2000 connections on my piddly ¼-vCPU container, and those logs were 2-4 MB compressed (20-50 MB uncompressed)
- Unzip all of the files (then delete the “.zip” files since you shouldn’t need them any longer).
- elb-log-analyzer can quickly roll up which routes were hit or which IPs hit them
- yarn init -y
- (you can use npm instead of Yarn)
- yarn add elb-log-analyzer
- npx elb-log-analyzer —col1=count —col2=client —col3=requested_resource —limit=20 <path to folder with lots of unzipped folders>
- The limit is 10 by default, so specify a very large number to have no limit.
- You should end up seeing a disproportionate amount of calls from specific IP addresses or to specific URLs.
- To “fix” this, use something like WAF or Cloudflare.
- yarn init -y
Setting up (reference)
Section titled “Setting up (reference)”- The information below is how I set up the account servers for Bot Land.
- Security groups
- First, just create an Account Server Security Group (“Acct Group”) and the ELB security groups (“ELB Group”) without adding any rules.
- ELB group - inbound rule - allow TCP traffic on port 8080 from any source. This is because random users in the world will hit the ELB as though it’s the account server. Note that by making this so permissive, I don’t explicitly need to give Matchmakers access to the Account Server.
- ELB group - outbound rule - allow TCP traffic on port 8080 and on the health-check port (which I set to 8081) only to the Acct Group
- This means that the only traffic to leave the ELB is to the private endpoints
- Acct Group - inbound rule - allow TCP traffic on ports 8080 and 8081 ONLY from the ELB Group
- Note: because the REST servers already have a REST API, the “health-check port” can just be 8080 since any API that returns 200 will work.
- First, just create an Account Server Security Group (“Acct Group”) and the ELB security groups (“ELB Group”) without adding any rules.
- Subnets
- My ELB is Internet-facing, which means it needs a public subnet with a CIDR block of at least “/27” (and 8 free IP addresses).
- When it comes to picking/understanding CIDR blocks, here are some resources:
- Calculate IP ranges from a given CIDR block (and keep in mind that you can’t just press the “Calculate” button without typing anything in since the placeholder isn’t really there)
- E.g. typing “10.0.0.0/16” will show that you get 65536 addresses from 10.0.0.0 to 10.0.255.255
- Some visual representations of setting up subnets
- In general, I think you need to figure out how many servers/instances you may want in each subnet at first. If it’s just a few, then allocating 64 IP addresses is probably enough (“/26”). If you need, say, 512 IP addresses, then use a “/23” block.
- Keep in mind that two of the available hosts will always be used for the network and broadcast addresses.
- Calculate IP ranges from a given CIDR block (and keep in mind that you can’t just press the “Calculate” button without typing anything in since the placeholder isn’t really there)
- I made three subnets using the VPC dashboard (and then by choosing “Subnets”). They all had the same name. They had consecutive CIDR blocks, and they had different availability zones.
ELB for account servers
subnet-75f00b11
10.0.1.0/27
AZ: us-west-2a
ELB for account servers
subnet-44d0cc33
10.0.1.32/27
AZ: us-west-2b
ELB for account servers
subnet-f0e7cca9
10.0.1.64/27
AZ: us-west-2c
-
To ensure that your subnets are indeed public, check their route tables to make sure there’s a route to an Internet gateway. There is a concept of a “main” route table which will be assigned unless you explicitly associate a subnet to a route table, so it’s possible that they’re already public. If not, you need to make a new route table and make sure you have an Internet Gateway set up (so create one if you don’t have it).
-
Set up a private subnet if you don’t already have one for your instances (i.e. the account servers). There’s no explicit need to do this other for load-balancing other than to ensure that your endpoints are not accessible on the Internet. So, for example, if you still want to be able to SSH into these instances, then you probably don’t want a private subnet yet.
-
Network ACLs
- I didn’t do anything specific here because my ACLs are super permissive. The instructions assume that you have restrictive ACLs (as you should) and that you need to open them up for the ELB.
-
Creating the ELB itself
- Go into the EC2 console, click Load Balancers, then click Create.
- Name: AccountServerLoadBalancer
- I set the load balancer port and the instance port to 8080.
- When picking subnets, I chose the public subnets for the ELB (the ELB for account servers subnets that I’d created earlier) since my ELB is Internet-facing. I did not need to do anything here with the private subnets.
- I didn’t enable HTTPS or SSL, so I got a warning about not having secure communication, but I clicked “next” anyway.
- Ping protocol: HTTP, port 8080, path ”/” (although it could be “/ping” or something if the server has a route for that).
-
Instances
- Make sure your instances have the Acct Group (security group) on them, otherwise they won’t accept traffic from the ELB.
-
Hosted zones
- My ELB got a DNS address of http://accountserverloadbalancer-2012962815.us-west-2.elb.amazonaws.com/
- I pinged this from the EC2 instance itself so that I could get the IP (although the ping itself will fail). Then, from my Windows machine, I connected to the ELB’s IP.
- I needed a public hosted zone so that the rest of the Internet could get access to this. Note that
- My ELB got a DNS address of http://accountserverloadbalancer-2012962815.us-west-2.elb.amazonaws.com/
HTTPS on ELB (reference)
Section titled “HTTPS on ELB (reference)”You can add a new listener by following those instructions, just make sure you also modify the security groups.
FYI: for Bot Land, I only need HTTPS on the page that the client requests (play.bot.land), but for the API itself, I have it listening on HTTP. The reason this works is because encryption is terminated at the ELB since I forward traffic to HTTP on the instance itself. This means the following:
10:37 syntonic8: @Adam13531 your infra will still work because the ELB goes from HTTPS -> HTTP. Your services talk directly to each other, so as long as it listens INTERNALLY on HTTP you’re good