Shotcut
Created: 2016-05-22 17:09:13 -0700 Modified: 2021-03-31 21:14:10 -0700
Installation
Section titled “Installation”Basics
Section titled “Basics”- I installed it here: “C:Program FilesShotcutshotcut.exe”
- This program crashes CONSTANTLY, so save very, very often.
- I noticed as of version 19 that playback becomes slow if I add somewhere around 3 or more tracks (which is sometimes necessary to achieve certain effects). To work around this, I would make a bunch of intermediate videos, that way I could merge those tracks into a single one in the final project.
- To add something to the timeline, choose Open File… and find your video or audio clip. This “stages” it, i.e. it won’t add it to the timeline automatically. You need to click the ”+” above the timeline to add it as a track.
- To trim parts of the video/audio on the timeline, you can right-click and choose “Split at playhead (S)” and then remove portions if you want.
- To export the video, choose “Export” at the top, then choose a codec (e.g. MPEG-4 for mp4), then at the bottom, you’ll see “Export File”. Choose that, and in “Jobs” (View -> Jobs) it will show progress up until the video is done.
- Shift+hover will scrub playback so that you don’t need to be accurate with clicking.
- You can lock tracks so that you don’t accidentally move/resize them. Just click the 🔓 icon at the left of each track.
- To insert space in between clips, use File → Open Other… → Generator → Color, then click the Paste button to put it where the cursor is.
- This is REALLY useful for removing space between two clips because you can expand the pasted clip to fit the dead space, then right-click and remove it.
Frequently used hotkeys
Section titled “Frequently used hotkeys”- S: split currently clip at playhead
- X: ripple-delete (same as right-click → remove): deletes the current clip and shifts subsequent clips left
Fading text in and out
Section titled “Fading text in and out”- Make a new video track
- File → Open Other → Color → Transparent (it should be the default)
- Add the color clip to the new track and resize it to match where you want the text to fade in and out
- Add “Text: Simple”, “Fade In Video”, and “Fade Out Video” filters. Make sure the fades have “Adjust opacity instead of fade with black”.
That’s it.

Exporting to GIFs
Section titled “Exporting to GIFs”Short answer: don’t. Export to webm instead.
You can export to a GIF by picking “GIF Animation” as the preset, but a 4½-second-long 1080p60fps video produces a 160MB GIF. You could click “Advanced” in the export dialog and lower the resolution/framerate to something like 960x540 at 24 FPS, but it still produces a 17MB file. Meanwhile, a webm at 1080p60fps would be 1.14 MB (and the mp4 would be 2.38 MB).
You can also use something like gfycat to make a webm for you, but Shotcut does it out of the box.
Keyframes (reference (although this video is way too long))
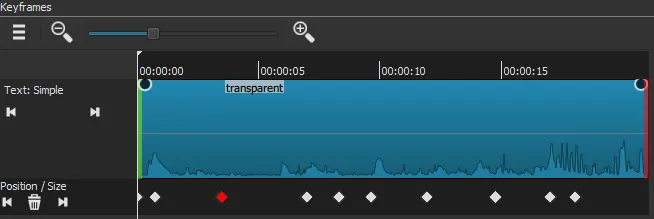
Section titled “Keyframes (reference (although this video is way too long))”When working with a video clip, add a video filter like Size and Position, then go to View → Keyframes and you’ll get drag handles that you can use to control how the keyframes work.
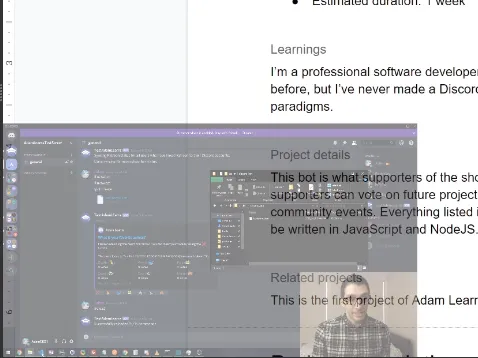
I used Google Fonts. Just click any sample text, type in custom text, then click “apply to all fonts” (see giant red arrow below):
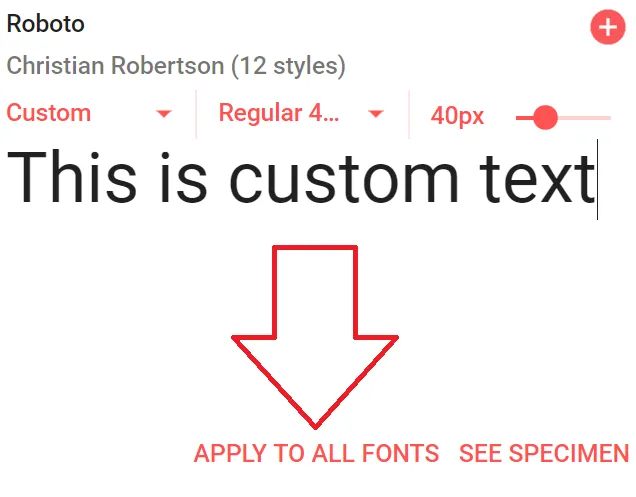
The ➕ will let you download the font to your computer for use directly in Shotcut. After installing the font, restart Shotcut.
Identifont lets you search for fonts similar to a font you already have a picture of.
Chromakeying (reference)
Section titled “Chromakeying (reference)”First, you need something behind the video you’re chromakeying.
A “Chromakey: simple” combined with “Alpha Channel: Adjust - Shrink Soft” is usually good enough. For pixel art, setting “Shrink Soft” to 0.1% will blur the edges enough for it to still look okay.
Animating text along an arbitrary path (reference)
Section titled “Animating text along an arbitrary path (reference)”- Make a new video track
- Make a transparent video track
- File → Open Other → Color → transparent
- Add it to your new video track
- Add text to video clip
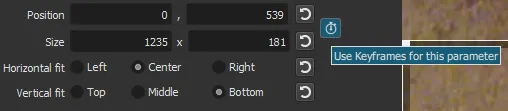
- Click “Use Keyframes for this parameter” button
- Drag the playback bar where you want it and then move the text to the appropriate spot at that point in the video. It should automatically add a keyframe:
Adding text to a video (reference)
Section titled “Adding text to a video (reference)”Click a particular video clip, add a Text filter, then split the video when you want the text to go away.
I find that this is difficult though because you’re splitting a “real” video clip, so I make a fake video clip out of a single-pixel image that I use the Size and Position filter to position off-screen, then add text to the fake video.
However, whenever you add text, you should probably style the text a bit to give it a shadow, fun colors, etc. For that, HTML is the best way to go, so add an Text:HTML filter to your video. It doesn’t render just like something like Chrome would though, so you may have to resort to writing HTML outside of Shotcut. The problem is that there will be a background color that you’ll have to chroma-key out, so I used html2canvas to render a screenshot. Just add this to your HTML file:
<script>
window.onload = function() {
const options = { backgroundColor: null }; // assign a transparent background
a = html2canvas(document.querySelector(“.container”), options).then(canvas => {
document.body.appendChild(canvas)
});
}
</script>
Then right-click the outputted canvas at the bottom of the page and save it. Do any further modifications in Photoshop or something.
Here’s a decent way to make “banner text” using the HTML overlay:
text.html:
<html><head> <link rel="stylesheet" type="text/css" href="style.css"></head><body> <div> /r/askreddit </div></body></html>style.css:
div { position: absolute; left: 50px; right: 50px; bottom: 30px; background-color: rgba(0, 0, 0, 0.4); font-family: Verdana; padding: 10px; text-align: center; font-size: 3em; text-shadow: -1px -1px 2px #000, 1px -1px 2px #000, -1px 1px 2px #000, 1px 1px 2px #000; color: white;}You can animate properties like this, but it’s going to make it very difficult to split your video clips since the animation will keep resetting:
div {  -webkit-animation-name: example;  -webkit-animation-delay: 3s;  -webkit-animation-duration: 1s;  -webkit-animation-iteration-count: 1;  -webkit-animation-timing-function: ease-in-out;  -webkit-animation-fill-mode: forwards;}
@-webkit-keyframes example {  from {    opacity: 1;  }  to {    opacity: 0;  }}
…so instead, I just add them to a new video track with a transparent color as the video clip: Open Other → Color → OK.
Exporting to unusual sizes
Section titled “Exporting to unusual sizes”(keyword: cropping)
My scenario was this:
- I screen-recorded a 1080p monitor
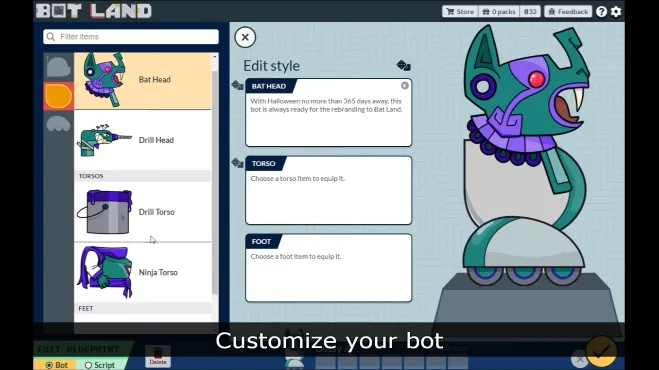
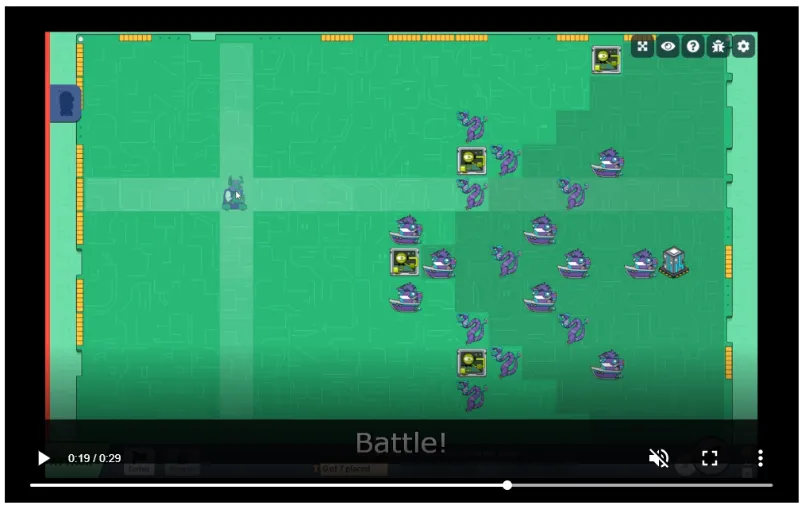
- I just wanted to capture a single 1356x850 window from this video. I did this because was recording Bot Land, and I didn’t want the UI of the game to be spread out too much (thus making it look like the game was designed with a bunch of whitespace when it’s really just on a large monitor).
I couldn’t find a way to do this solely with Shotcut, so what I did was use the Crop: Rectangle filter to draw a rectangle where the window was, that way I could figure out the offsets for ffmpeg. Then, I ran ffmpeg with those offsets. See this note on ffmpeg cropping.
Note: as far as I can tell, there’s no way to export with custom ffmpeg filters directly from Shotcut.
Change speed of video
Section titled “Change speed of video”Click a track, go to the Properties tab (view → properties), then configure the speed.
Taking a “still” or short clip from a video and having that play while audio continues
Section titled “Taking a “still” or short clip from a video and having that play while audio continues”WOW, APPARENTLY THIS IS SUPER EASY AND ALL OF THE NOTES BELOW THESE STEPS ARE DUMB:
- Open an image file
- Add it to the timeline
- (that’s it)
This is useful if I want to have a diagram show on the screen while I still have audio playing over it describing the various details.
New way that seems way better:
Split out the portion you want to show by using Split at Playhead (S) in the timeline.Click the clip.Click “Properties” in the top barChange speed to 0.01.Use the ‘S’ key to split out however much you want as a still picture.If a speed of “0.01” (which is the lowest allowed at the time of writing) didn’t produce a long enough “still”, then copy/paste the clip multiple times into the video track (which is basically just the “old” way that I used).
Old way that I used:
Split out the portion you want to show by using Split at Playhead (S) in the timeline.Right-click the split portion and click “Open as clip”Press ctrl+Y to add a new video track to the timelinePress C a bunch of times to put the clip into the timeline.If you try “extending” the length of the clip left or right, you’ll actually end up pulling more video content from the original, unsplit source. So, for example, if your original video shows a diagram and then later shows you switching to your browser window, then by “extending” the shortened clip, you’ll actually end up seeing the browser window in your clip.
You’ll probably want to mute the video track that you just created.
Spotlight effect (reference)
Section titled “Spotlight effect (reference)”Make two video tracks: bottom and top (they should be copy/pastes of each other). Apply Mask: Simple Shape to the top and Opacity to the bottom. You can animate the opacity of the bottom video to have the spotlight fade in.
Using just audio from a video clip
Section titled “Using just audio from a video clip”- Press ctrl+U to create a new audio clip.
- Drag a video clip to the audio clip on the timeline. That’s it.
Filters
Section titled “Filters”Resizing video (or putting a colorkey/alpha/transparency effect)
Section titled “Resizing video (or putting a colorkey/alpha/transparency effect)”- Choose your video track in the timeline first.
- Choose View —> Filters
- Click the ”+”
- Choose the second “tab” (the monitor-lookin’ icon at the bottom). These are video filters.
- Choose your effect and configure it. You don’t need to add it to the timeline. I’m pretty sure it affects the entire video, so you’ll need to make a bunch of video tracks if you want to change the filters around
Note: to get an effect like this, it’s the OPACITY filter, not something with “Alpha”
Note: crop/resizing is called the “Size and Position” filter, but it’s a little tough to use to crop. You crop by positioning the video out-of-bounds.
- UPDATE: never mind, you can add a Crop filter, but only when a clip is selected, not a video track. To get the same crop parameters on multiple clips, you can save a preset and use that.
- If you’re going to crop an entire video (say a 1920x1080 video to a 1280x720 video) by cropping all of its video clips, then you also need to go to Settings → Video Mode → HD 720p 60 fps. Without this, you may think to add a Size and Position filter, but that either results in blurry videos or black bars being added.
- When exporting, if it’s still somewhat blurry, adjust the quality in Export → Codec. 90% seemed to look pretty good for a text-heavy video.
- Also note: I could not for the life of me get Twitter to recognize that I wanted to upload a video cropped like this, so I had to upload it to YouTube and then download their processed mp4 to get it to work.
- If you’re going to crop an entire video (say a 1920x1080 video to a 1280x720 video) by cropping all of its video clips, then you also need to go to Settings → Video Mode → HD 720p 60 fps. Without this, you may think to add a Size and Position filter, but that either results in blurry videos or black bars being added.
“Crop: Rectangle” will have black boxes around the video unless you set the padding color to transparent. Video track “V1” always has black boxes behind it since there’s nothing to composite onto. Compositing mode can be viewed by right-clicking a track and going to properties, then you’ll see blend modes like “Screen” and “Multiply”.
Normalizing audio level
Section titled “Normalizing audio level”Just add an audio filter called “Normalize: One Pass”. I haven’t tweaked this too much since I usually only have one audio track, but it should be easy enough to use.
Actually, the Normalize: Two Pass filter is better since it analyzes the whole file once in order to find better levels, but it can only be added to a particular clip, not a whole track.
”Dissolve”
Section titled “”Dissolve””This is just “fade in” with the “Adjust opacity instead of fade with black” checkbox enabled.
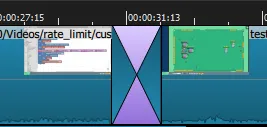
Note that if you drag a video clip such that it’s overlapping another in a track, it’ll make a symbol like this and then dissolve between the two videos. This is pretty helpful!
Adding text
Section titled “Adding text”- Chances are that you’ll only want text to show for a short amount of time, so you may want to split your video at the playhead so that text is only for a particular portion of the video.
- Choose your video track in the timeline.
- Choose View —> Filters
- Make sure the track is correct at the top of the Filters section. Mine has “Video” listed instead of something like “Track: V1” because I’m just applying the text during a clip.
- Click the ”+”
- Choose the second “tab” to see video filters.
- Configure the “Text” filter.
- You don’t need to add it to the timeline; it will just affect whichever clip you have selected.
Troubleshooting
Section titled “Troubleshooting”Images appear blurry in outputted video (especially images with text)
Section titled “Images appear blurry in outputted video (especially images with text)”I tried changing the interpolation algorithm (on EXPORT → Advanced → Video, not the Settings menu) to “Hyper/Lanczos (best)” and also tried adjusting the “Quality” in the “Codec” tab while exporting the video, but neither worked. The solution I needed to do was to apply a “Size and Position” filter with the “Size mode” set to “fit”. I’m guessing the images were being upscaled or something.
If it’s an image with text, the Sharpen video filter is helpful.
Images don’t appear in the outputted video (almost like a keyframe is missing)
Section titled “Images don’t appear in the outputted video (almost like a keyframe is missing)”This happened with a magic-eye picture that basically looked like random pixels, so I assume it had something to do with the interpolation that I was exporting with. Neither splitting up the clip nor layering it onto two video tracks worked. In the end, I exported at 65% quality instead of 75% and maybe changed the exported interpolation setting from “best” to just “better”.
“Good” and 65 didn’t work. “Best” and 55 worked.
Failed with exit code -1073741819 (reference)
Section titled “Failed with exit code -1073741819 (reference)”In short, Shotcut can’t process something. Right-click the job in the Jobs window and go to “View log”. Then, find the last line that says “Current frame: ####” (it should be the second-to-last line in the log). For me, it was 1323, and my framerate is 60 FPS, so it would be 3 frames after the 22-second mark in my video. That was right when audio should have been changing, so I just deleted the audio clip that I thought might be problematic and tried re-exporting. It worked, which meant I needed to figure out a different solution for that particular clip.
Note that simply muting the entire audio track didn’t work when re-exporting; I had to remove the offending clip.
Audio blips/pops for some reason
Section titled “Audio blips/pops for some reason”I don’t know what caused these, and they were very subtle (almost to the point where I couldn’t hear them), but it sounded like a small puff of air for a fraction of a second. The audio file didn’t have this sound, and it only happened when a previous audio file had played (and then finished).
To work around this, I exported the whole video as an mp3 so that just the audio was present, then added that as a track to the final video (with the source audio tracks muted this time around).
BETTER WORKAROUND (reference): click an audio clip, go to Properties, click the hamburger menu, then choose “Convert to Edit-friendly…“. Choose the best quality (MKV), then plop that into your audio track rather than an mp3.
Black bars on the side of a video (reference)
Section titled “Black bars on the side of a video (reference)”I had a source video that was 1356x850, and I manually added a video mode that was 1356x850 (although the aspect ratio was 16:9). The video had black bars on the sides:
I fixed it by doing Settings → Video Mode → Automatic