BitBucket
Created: 2016-02-22 14:28:58 -0800 Modified: 2018-09-10 09:11:41 -0700
Pull requests
Section titled “Pull requests”Creating a pull request
Section titled “Creating a pull request”First, push your branch to BitBucket. If it’s a new branch, you need to specify which remote you want to use. For example:
git push —set-upstream REMOTE_NAME BRANCH_NAME
(shorthand for “—set-upstream”: “-u”)
Go to “Pull requests” in BitBucket
Choose “Create pull request” at the upper right. The URL for this if you want to get there quicker looks something like this: https://bitbucket.org/onaimada/botland/pull-requests/new
The rest is straightforward enough where you can just follow the UI.
After finishing, do a “git checkout master” and a “git pull”. Then make a new branch afterward.
Note that your branch that likely got deleted in the merge will still be around locally. You can remove it like this
git branch -d BRANCH_NAME
HiDeoo Personally I use “‘git branch —merged | grep -v "" | xargs -n 1 git branch -d‘“
Editing pull requests
Section titled “Editing pull requests”To make edits to incoming pull requests, I think you need write access to the fork. If you don’t have it, then apparently you can’t make edits according to this.
To invoke the edit, either click “View file” or the ”…” and choose “Edit file”:

Syncing to master
Section titled “Syncing to master”From my understanding, if you want the fork to be updated to master, then you can use “Sync now” from the “Commits” header. This may make it easier to merge in the end since you should have no conflicts that way. This isn’t required; if you don’t do it, you’ll just have to merge into master.

Viewing pull requests off of BitBucket (e.g. for testing)
Section titled “Viewing pull requests off of BitBucket (e.g. for testing)”Pull requests are really just forks of the repository, so you can clone the forked repo and checkout to the same branch:
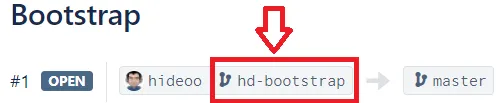
First, click the source:
This will bring you to a page that shows “Check out”

However, I think that it assumes that you’ve already either cloned the source repo or added it as a remote to your existing repo. Adding the source repo as a remote is the easier way of doing things (TortoiseGit reference for how to do this). As for the URL that you add as a remote, you can get it from the root of the repository (it looks like this: git@bitbucket.org:hideoo/botland.git).
After adding a remote, just run the command that you find in the “Check out” menu:
git fetch && git checkout hd-bootstrap
You’ll see something like this:
$ git fetch && git checkout hd-bootstrap
Switched to a new branch ‘hd-bootstrap’
Branch ‘hd-bootstrap’ set up to track remote branch ‘hd-bootstrap’ from ‘hideoo’.
Note: ignore the “new” part of that. It’s saying that it’s a new local branch, not that it’s a new remote branch.
After that, you can just use local git commands. For TortoiseGit, I opened the log via “TortoiseGitProc.exe /command:log”, ctrl+clicked the commit before the fork into master and the latest commit, then compared revisions.
Close source branch
Section titled “Close source branch”You typically do want to close source branches unless more work has to be done in them:
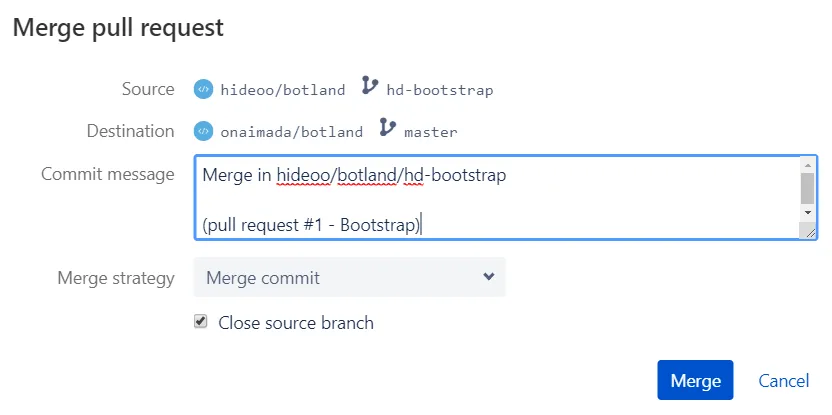
I believe you’re only given this option if you have write access to the source repo.
Gray commits
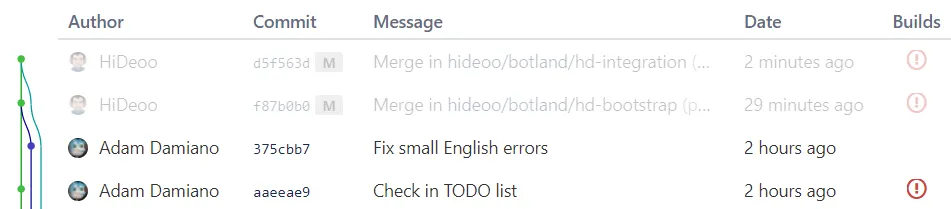
Section titled “Gray commits”Merge commits are gray
Fixing merge conflicts
Section titled “Fixing merge conflicts”UPDATE: I never actually wrote out good notes for this. When I need to do this in the future, look through this:
Related to stream PR issue: 3mn egghead video of the exact workflow I personally use when rebasing a PR explained by Kent C. Dodds https://egghead.io/lessons/javascript-how-to-rebase-a-git-pull-request-branch (It can’t get any simpler, he’s a good speaker and even show you how to cancel the operation if anything goes wrong)
BitBucket has you do this on your own system. Clicking “Merge” will give you instructions on which exact commands to run, but that’s only if you have write position to the master branch.
Instead, I followed the instructions here. Note: in my case with Bot Land, “upstream” is my repo and “origin” is HiDeoo’s. What’s confusing is that I named my remote “origin” and HiDeoo’s “hideoo”, so I’ll be using the remote names below.
git fetch origin
git checkout hideoo/NAME-OF-BRANCH-IN-PR
git merge origin/master
At this point, I opened TortoiseGit to commit and could fix the conflict from there
Then I got stuck because there was a detached HEAD, gave up, and said I’d come back to it later.
Finalizing the pull request
Section titled “Finalizing the pull request”After merging, don’t forget to pull and then switch back to whatever branch you were on:
git pull
git checkout master
Note: BitBucket can be slow sometimes, so you may have to wait ~2 minutes if you don’t get anything new on “git pull”.
Small tips
Section titled “Small tips”There are some features you can enable/disable by clicking your picture, going to “Labs” in the settings, and then taking a look through there. One of them is the Beta BitBucket UI (as of September, 2018 at least). It apparently doesn’t cover all of the features of the non-Beta UI yet, so it may be worth turning off.
Limiting access based on SSH key
Section titled “Limiting access based on SSH key”Deployment keys are per-repo and can limit access so that a user with the key will have read-only access. Use “ssh-keygen” to generate a passwordless key, then upload the public key online.
Note: if you make a new repo, it’ll automatically be accessible with the SSH key tied to your BitBucket account, so setting a deployment key will only add a means of accessing it, but it’ll be read-only access through that key.
Troubleshooting
Section titled “Troubleshooting”Contact support
Section titled “Contact support”https://support.atlassian.com/contact/#/
Their support actually seems really good/prompt even on the free tier.