Raspberry Pi
Created: 2020-02-21 18:31:10 -0800 Modified: 2023-10-09 20:12:55 -0700
Basic setup
Section titled “Basic setup”Note: I got a Raspberry Pi 4 kit that came with an SD card that already had a Raspbian bootloader on it, and I didn’t want a desktop environment. Setting it up was a piece of cake:
- Connect everything and get to the OS selection screen.
- Instead of picking an option from the SD card, choose Wi-Fi and connect to the network.
- Install Raspbian Lite, which has no desktop. This takes 10-15 minutes.
- Login with a username of “pi” and password of “raspberry”.
- Run $ sudo raspi-config
- Choose “1. Change password” and change the password
- Choose “5. Interfacing options” → “P2 SSH” → Yes
- Choose “8 Update” - it’ll take about a minute or so
- From your main computer, run “ssh pi@IP_ADDRESS_OF_PI”. I got the IP from my router’s administrator page.
- sudo apt install nodejs git vim htop screen curl ripgrep
- ↑ And install whatever else you want.
Note to self for personal setup:
Section titled “Note to self for personal setup:”- No need to set up SSH keys into the Pi, just connect through VSCode with the “ssh” extension via “pi@<IP address my router reports>”, then open a folder for development and use the terminal right in VSCode.
Quick guide
Section titled “Quick guide”- Getting to the desktop from the console
- Typically it’s startx, but typing “start” and hitting tab will show you all options.
- Quick-launching the terminal from the window manager
- Alt+F2 → lxterminal
Pulling code from GitHub
Section titled “Pulling code from GitHub”(writing SUPER high-level notes here)
ssh-keygen
SCP the key off of the machine and onto GitHub
Setting up a static IP (reference)
Section titled “Setting up a static IP (reference)”ip r | grep default
Note the first IP address as your router IP.
sudo vim /etc/resolv.conf
Note the IP as your name server’s IP.
sudo vim /etc/dhcpcd.conf
Uncomment either your Wi-Fi’s (“wlan0”) or your Ethernet’s (“eth0”) connection:
interface <NETWORK>
static ip_address=<STATICIP>/24
static routers=<ROUTERIP>
static domain_name_servers=<DNSIP>
Note: eth0 and wlan0 will have different MAC addresses, so if your router is assigning IP addresses, you may need to modify your router too.
Using the Pi as a Wi-Fi extender (reference)
Section titled “Using the Pi as a Wi-Fi extender (reference)”I ended up following these instructions, but I ended up with a completely separate SSID (since using the same SSID didn’t result in my phone connecting to my Pi despite the Pi’s signal being much stronger). Running “sudo iw dev wlan0 set 4addr on” on my Raspberry Pi 4 shows “command failed: Operation not supported (-95)“.
Internet-speed test (reference)
Section titled “Internet-speed test (reference)”pip3 install speedtest-cli
speedtest-cli
This reports way lower speeds though than what I’m actually seeing with wget and ping.
Troubleshooting
Section titled “Troubleshooting”Factory reset
Section titled “Factory reset”If you installed using NOOBS, then you should be able to either hold or tap shift at first boot to get to the factory-reset option. However, that didn’t work for me due to some weird keyboard-powering problem, so I just used my micro-SD-to-USB adapter and put a new NOOBS image onto the card so that I could start from scratch.
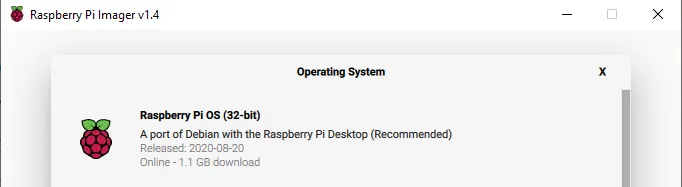
Note that if you go this route, the Raspberry Pi Imager is all you need; it will download Raspbian for you (see screenshot below). However, if you did download a zip, then select the option toward the bottom that implies a “.img” file is needed since it accepts a .zip as well.
No network connection
Section titled “No network connection”If you have console access, run “sudo raspi-config” and choose “Network Options”.
If that fails with “could not communicate with wpa_supplicant”, then follow the instructions here.
sudo killall wpa_supplicant
sudo wpa_supplicant -c/etc/wpa_supplicant/wpa_supplicant.conf -iwlan0
If it starts successfully, then press ctrl+Z to background the app.
Keyboard doesn’t work at first boot
Section titled “Keyboard doesn’t work at first boot”I fixed this by just plugging in the keyboard to a different USB slot on the Pi. I think that even plugging it into the same one would be fine too.